
AWS Lambda is an ingredient in amazon serverless computing. Lambda allows us to run server-side code without thinking about the server. It abstracts all of the other components i.e. servers, platforms, virtual machines, etc. that are needed to run server-side code. So we can just focus on the code and not the server. That way the time to production or deployment becomes very less. We can write a lambda function, configure it and run it in minutes.
Another great benefit of lambda is that we just pay for the compute time we consume. That means it will charge only for the time that our code is actually executed. Also, the first one million requests are free. We have to pay for request thereafter. This a very cost-effective way to run the server-side code. To get started first we need an AWS account. After creating the account we need to go to the AWS management console.
……………………………………………………………………………………………………
Create a Lambda function with Node.js
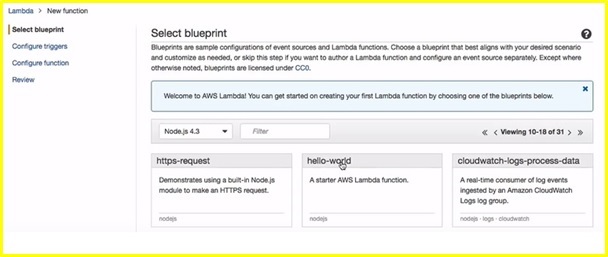
Let’s create a lambda function that picks a random number between 2 given number. First of all, login into the AWS console and then click the “Lambda” button under the compute section. Then you can come to the “Select blueprint” section. Then, under the select runtime combo box, select the latest node.js version. Amazon gives you some basic blueprints there. We will just select the simple hello world function to start with.
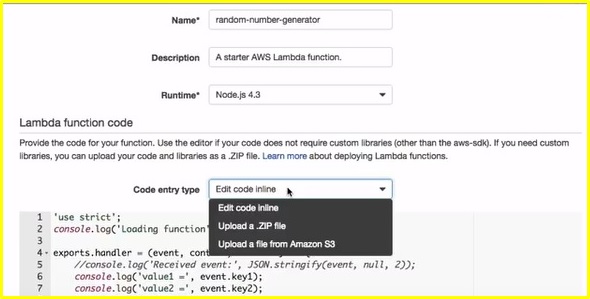
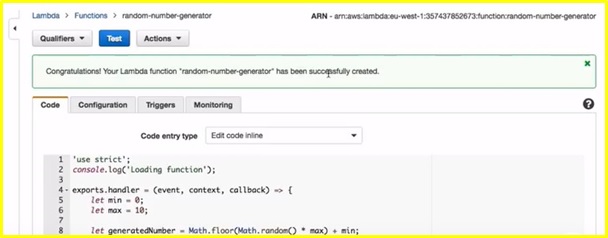
We will skip to the configure function section to create a new function. We will name our function random-number-generator. Then specify the description. Then the run time that is node 4.3. Our function is a small function so we will select to Edit code inline. The blueprint of amazon gives a very basic function.
We will change this default code to generate our random number between two given numbers.
In the beginning, just add console.log(‘Loading function’). This will help in debugging the code.’ In the default amazon function, there are some event values that are logged and in the end, it returns the first value in the callback function. Then we will add a handler function to the exports variable. And this function receives 3 variables. I.e. event, context, and callback.
exports.handler = (event, context, callback) => {
console.log(‘value 1 =’ , event.key1);
console.log(‘value 2 =’ , event.key2);
console.log(‘value 3 =’ , event.key3);
callback(null, event.key1)
}
The callback is something we will call when our result is ready and we want to send some result back to the user. It takes 2 parameters. 1st one is the error and the second one is the success message. The variables could be string or JSON object.
We will delete all these default codes and write our own code. So, first of all, we will define and set the minimum and maximum number.
exports.handler = (event, context, callback) => {
let min = 0;
let max = 10;
}
Now we will define another variable for the random number.
exports.handler = (event, context, callback) => {
let min = 0;
let max = 10;
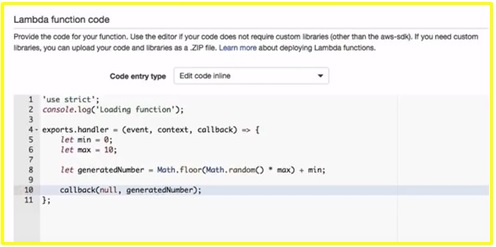
let generatedNumber = Math.floor(Math.random() * max) + min;
}
Mmath.random() generates a random number between 0 and 1. And it’s a floating-point number, so we multiplying it by max and the round it and add the minimum. That gives us a random number between the minimum and maximum number.
Now we are done and want to return the random number. So we will call the callback function.
callback(null, generatedNumber);
Here there is no error handler implemented so we will just return null in place of the error parameter. And the generatedNumber.
That’s it, the code part is done.
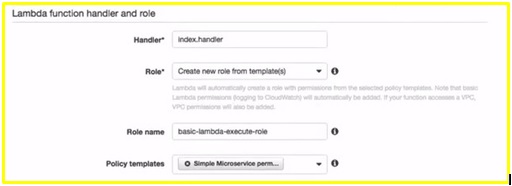
Now scroll down. And let’s define our handler. The default is index.handler. Index refers to the filename and handler is the name of the variable that is attached to the exports. We will leave this by default.
Now, we will create a new Role and give the role name as ‘basic-lambda-execute-role’. Then under the policy template, we will select ‘Simple Microservice Permissions’.
Next is the advanced settings.
Each lambda function will run in a container & that container will have some memory allocated to it. So here we can pick how much memory should be allocated to our function. Our function is a basic function. So will select 128MB. That is more than enough for our function.
This does not only defines the memory allocated to the function but also the amount of processing power amazon uses to execute our function. If we have a more resource-intensive function then we can increase the memory usage and we will get a faster performing function. Then for the timeout, we will leave it to 3 secs that is enough. If our function does not finish within this timeout then Amazon will return an error message. We will leave the VPC to no VPS and move next. In the next page, amazon lets us review our configuration for our function. And then click the create function. There we will get the msg that our function is created. And we can see the dashboard for our function.
On the dashboard we can see our code, configuration, triggers, and also we can monitor our function as well
Let’s test it by clicking the Test button there. If we scroll down we can find that the function has executed successfully and also we can see the result random number.
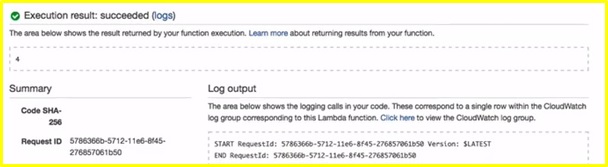
So that’s it. We have our random number generator lambda function is running now.
……………………………………………………………………………………………………
The views and opinions expressed in this article are those of the author. To know more about our company, please click on Mindfire Solutions.