LESS CSS framework is intended to make/design adaptive websites. The framework extends the use of CSS with dynamic behavior such as variables, mixins, operations, nestings and functions.
Generally LESS runs on both the server-side (with Node.js and Rhino) or client-side (modern browsers only).
Using this guide you can move in the right direction in starting up with the LESS CSS and eventually develop your own websites using it.
WHY LESS CSS?
The day we have started using CSS for enhancing the look and feel of our HTML websites, we found it quite interesting and in a gradual process, it has changed the way our websites appear.
Day-by-day CSS was used all across the world wide web, starting from static website development, till UI as well as web application development. Looking into the global use of CSS across the web, all UI persons and web designers started using it in every project without looking towards the limitations of it.
A significant amount of design time with CSS is spent rewriting common code for routine operations and maintenance works for a site in the form of color change, font change and such like. Of course, all this routine code can quickly become disorganized in traditional CSS designs.
Problem occurs on the cases, where we we have thousands of lines of styles and some separated CSS files to maintain. What is needed is a framework for CSS that will work in the same way like the other dynamic pre-processors(PHP) do during the web development.
LESS CSS Framework has been around for a while and does exactly that. LESS extends CSS with dynamic behavior in association with variables, mixins, operations and functions in support of common tasks that includes the facility for organizing code in folders and files. As a result, time spent writing and organizing CSS code becomes greatly reduced. In general, being a LESS framework user, I must say that the use of LESS has made my CSS coding look more clean compared to the traditional use of CSS.
My favorite feature in the LESS CSS is the ability to use the variables in the form of define something once, assign a value to it and refer to it later throughout the CSS script. This feature works the same way I use PHP variables.
What Editor shall I use to write LESS CSS?
There are several editors available widely for LESS CSS code writing. But the editor that most of the CSS coders are using across the world and the editor that specifically meant to support LESS file editing, is the ChrunchApp. CrunchApp is a cross-platform application, built on Adobe Air, which can be run on any environment, whether it may be on Windows, Mac OS X or Linux.
So, what we are waiting for? Let’s download the CrunchApp. Install it and start writing our first LESS CSS.
How to use LESS
As we have already discussed that, LESS is used both in server-side as well as Client-side. Among the both ways of LESS framework uses, Client-side is the easiest way to get started and good for developing websites using this LESS CSS.
To start coding using the LESS framework, we need few lines of code inside the <head></head> tags of our HTML document. First, the .less framework file on which we will write all our css scripts and next to that, the less.js library, which helps in rendering the .css file out of the .less file.
Using LESS is really easy. We only need this two lines inside the head tag of your HTML document.
<link rel=”stylesheet/less” type=”text/css” href=”less/style.less”>
<script src=”js/less.js” type=”text/javascript”></script>
Now, let’s see how to write code using the Crunch LESS compiler and compile the .less file into a fully functional .css file.
First of all, let’s open the CRUNCH compiler application.
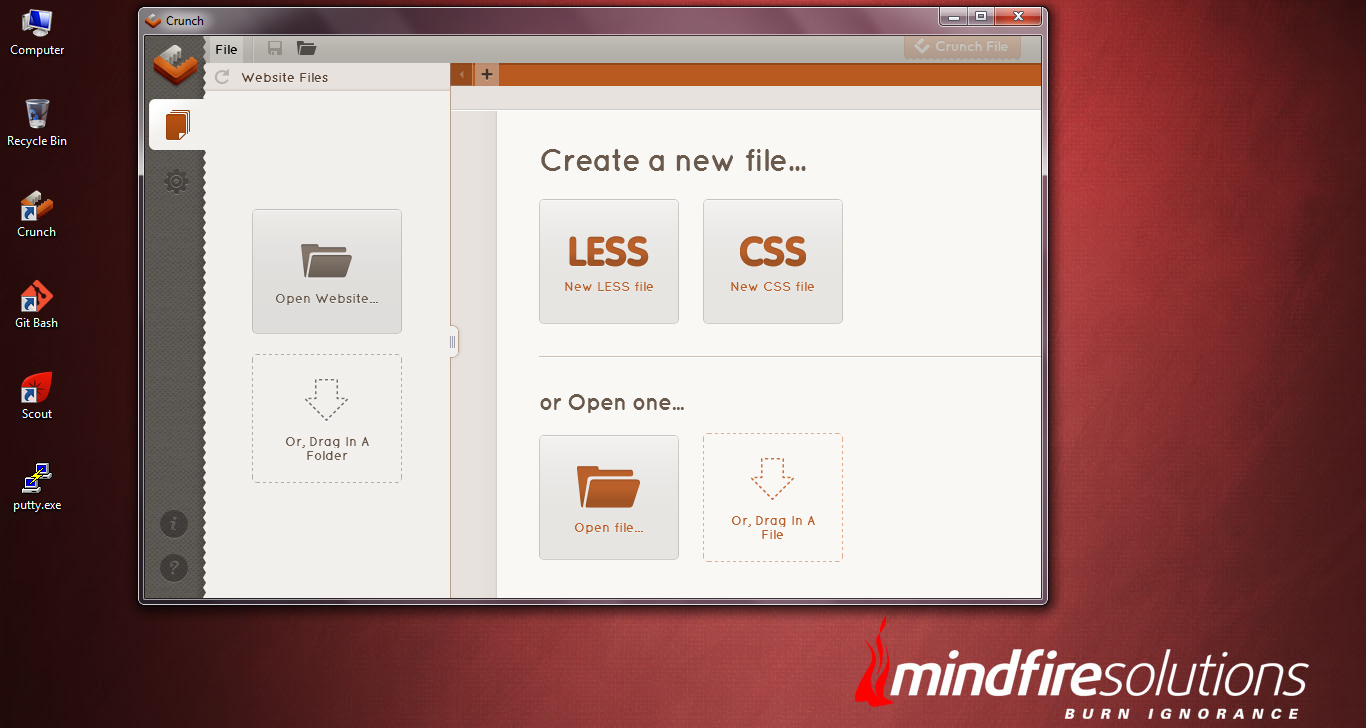
Crunch LESS compiler is a quite easy to use. The whole application base is quite user friendly and visually appealing without giving the feel of getting cluttered. Genuinely you will feel fun to use this application.
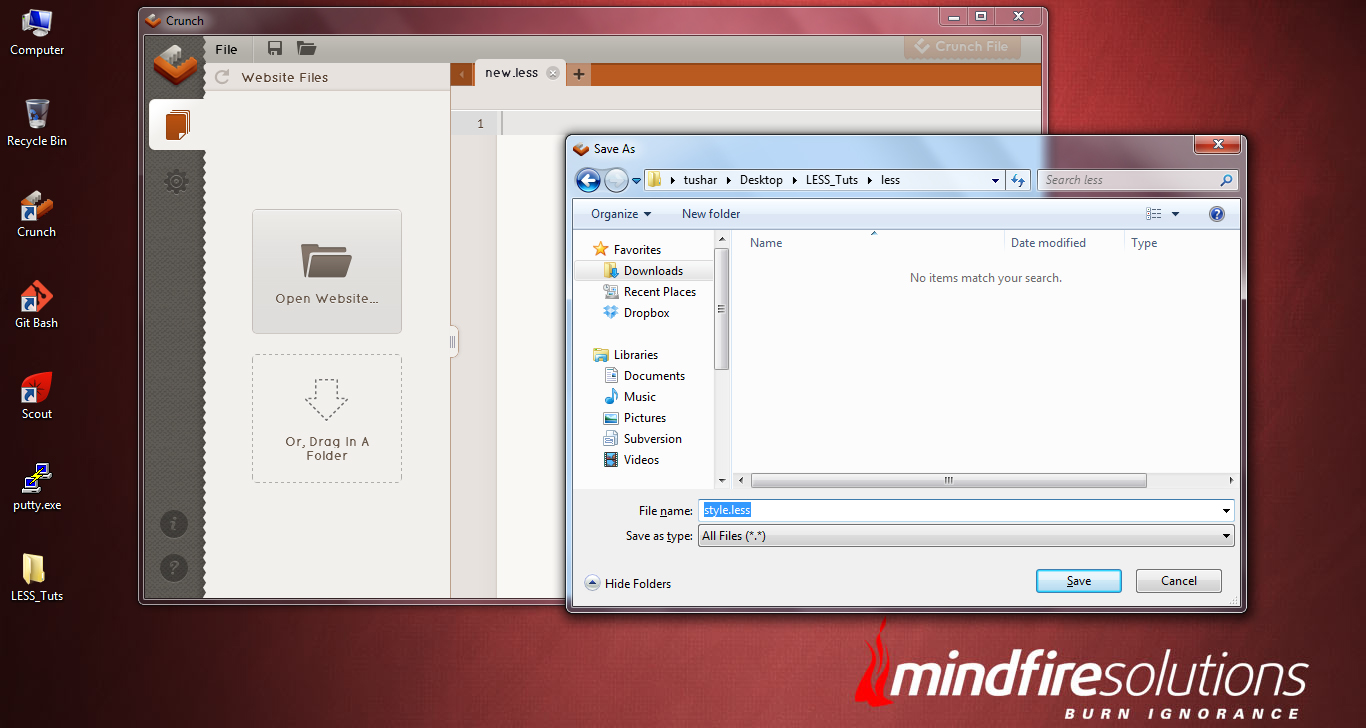
Now click on “Create a New LESS file” button. This will prompt to save your newly created .less file within a directory. Give it a name (I have given style.less) and save it within the directory named as “less”.
NOTE: Before creating a .less file, make sure you have created your projects directory within your computer and created two sub-directories (css directory) and (less directory) within it.
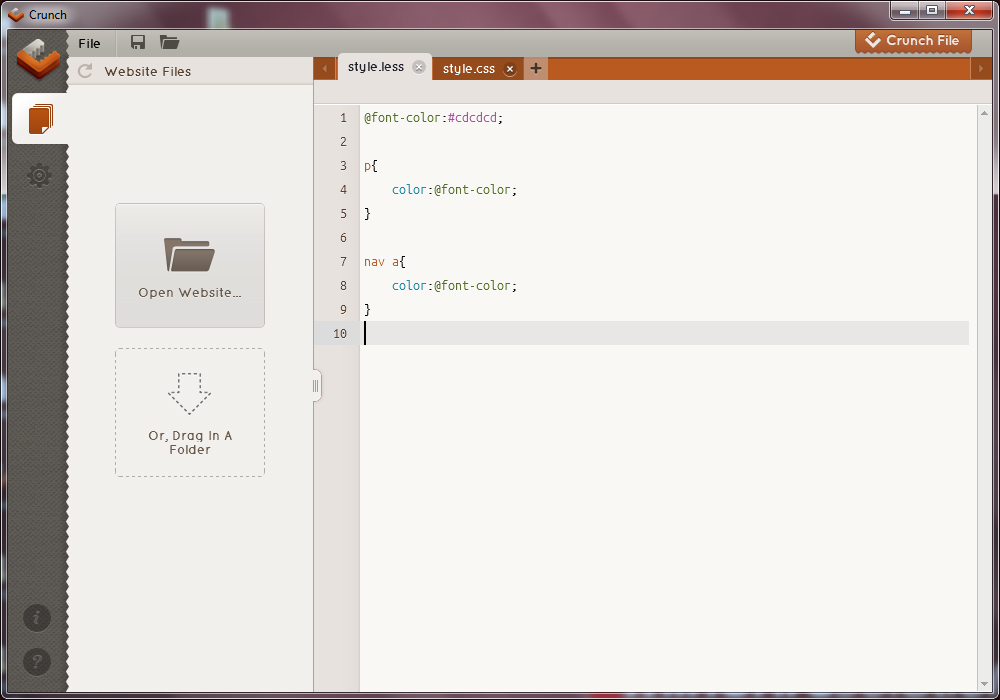
Now you can see your style.less file being opened in the Crunch Editor. Click the “+” icon next to the file name “style.less” in the editor. This will create a new .less file. But this time, save this file with the name of style.css within the “css” directory we have created previously.
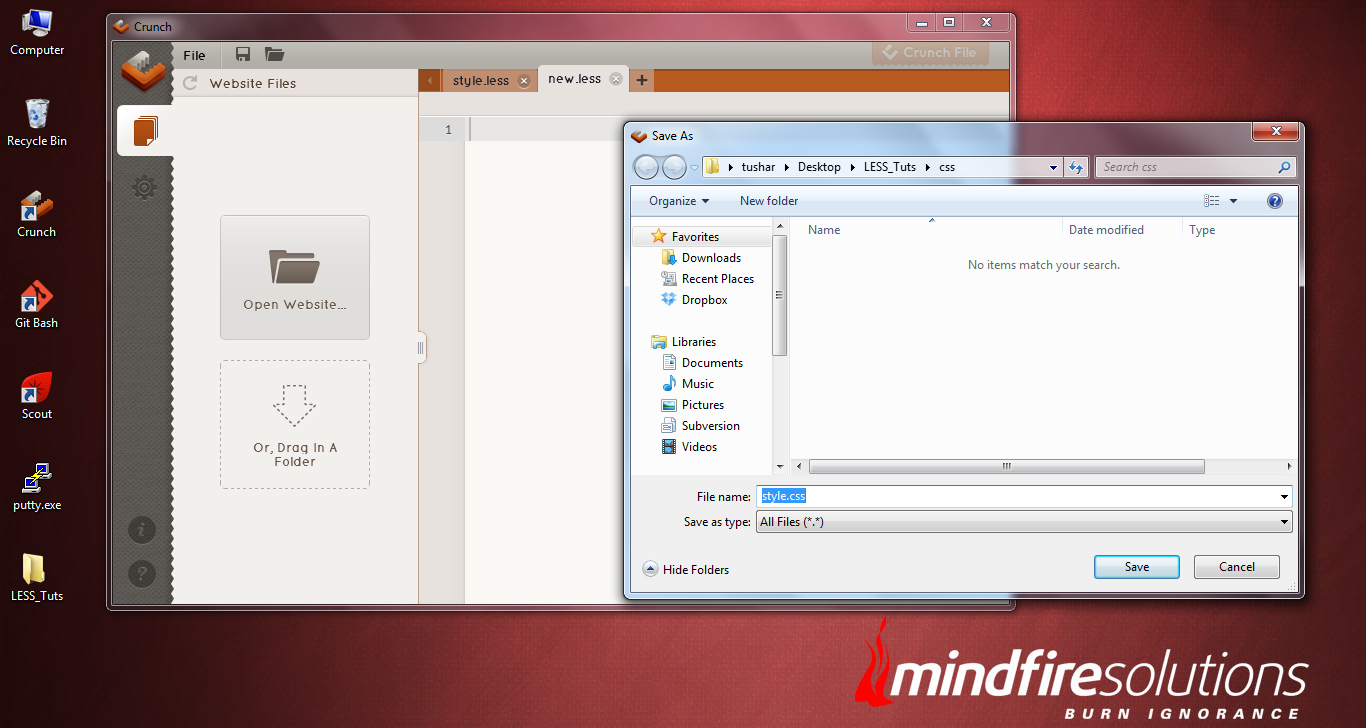
Now you can find, two files opened in the Crunch editor (style.less and style.css). Among these two, we have no use on the style.css file, as our main purpose is to write LESS css scripts and which will be compiled to .css scripts and be saved in the style.css file.
As of now, we are all set with the creation of files and directories. Now, it’s time to create a simple html layout, based on what we will write some basic LESS CSS scripts to see our progress on the scripting.
Now, our only need is to link the CSS file into our HTML document, as follows;
<link rel=”stylesheet” type=”text/css” href=”css/style.css”>
Let’s see, how to integrate the .less file and the LESS JS library into a basic HTML script.
<!DOCTYPE html>
<html>
<head>
<title>LESS Framework Tutorial</title>
<meta name=”viewport” content=”width=device-width, initial-scale=1.0″>
<link rel=”stylesheet/less” type=”text/css” href=”less/style.less”>
<script src=”js/less.js” type=”text/javascript”></script>
</head>
<body>
<div id=”container”>
<div class=”shape1″ id=”shape1″></div>
<div class=”shape2″ id=”shape2″></div>
<div class=”shape3″ id=”shape3″></div>
</div>
</body>
</html>
As you can see from the above HTML layout, we have integrated the two lines of codes (the css file and the less js library) inside the <head> part of our HTML. Make sure the .less file is integrated before the less.js file within the head.
Along with the above coding, we are all setup with the LESS CSS framework to work on out basic HTML template.
The next thing we will discuss is, some basic syntax that are mostly used during LESS CSS editing.
Before learing the basic use of LESS, let me remind you that, being an extension to CSS, LESS is not considered to be backwards compatibility of the traditional CSS, but the truth is, it adds the same use existing CSS syntax in a different and modern way. This makes the CSS coders learning LESS to be quite interesting and fun too.
Unlike our regular CSS coding, LESS works in a similar way and more-or-less like a programming language. But it’s dynamic feature has made it interesting and dynamic too. So, we must expect to find certain terminologies like Variables, Operation and Scope along the way unlike we use them in our other programming / server-side languages.
VARIABLES in LESS
In the traditional CSS that we are presently using, cases we came across where probably we write something like this, where we use repetitive values assigned to some properties to some id/classes in the entire style-sheet.
.shape1 {
color: #5cb100;
border: 1px solid #5cb100;
}
.shape2 {
background: #fff;
color: #5cb100;
}
.shape3 {
border: 1px solid #5cb100;
}
Writing this piece of code in our stylesheet is quite similar in most of the cases for the web designers and using this kind of css is also perfect to go with. But the problem arises, when our client want us to replace the color #2d5e8b across the site. Things became so tedious when we start modifying the stylesheet.
But things can be solved by using a CSS pre-processor, that can easily replace the traditional methodology of defining the styles. We can use a variable to store a constant value for it and use it later throughout the stylesheet.
@my-color: #5cb100;
.shape1 {
color: @my-color;
border: 1px solid @my-color;
}
.shape2 {
background: #fff;
color: @my-color;
}
.shape3 {
border: 1px solid @my-color;
}
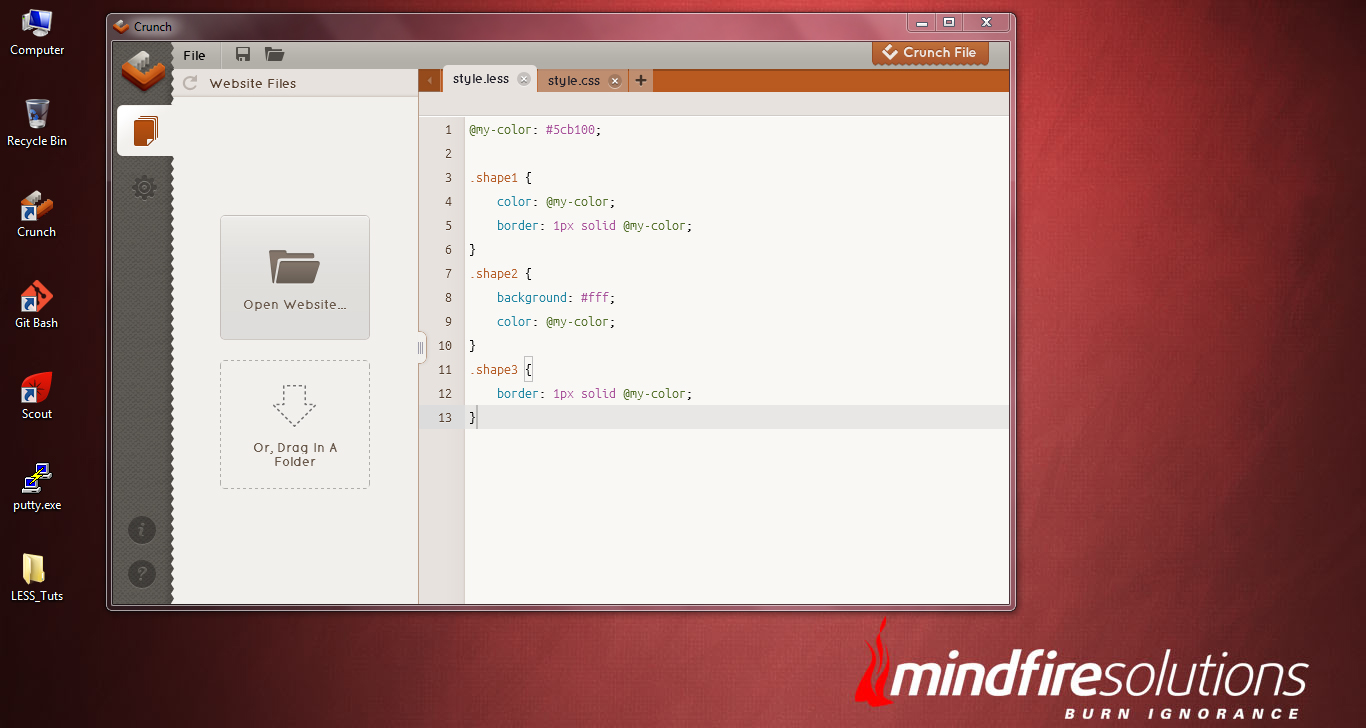
NOTE: In LESS CSS framework, variables are defined using the “@” symbol.
In the code aove, we stored the color value #5cb100 within a variable named as “my-color” and used that variable wherever we need to have that color. In this case, if suppose we need to change the color from “#5cb100” to “#250b0c”, we can easily achieve this just by replacing the color value at the top of the code by replacing the “@my-color: #250b0c”.
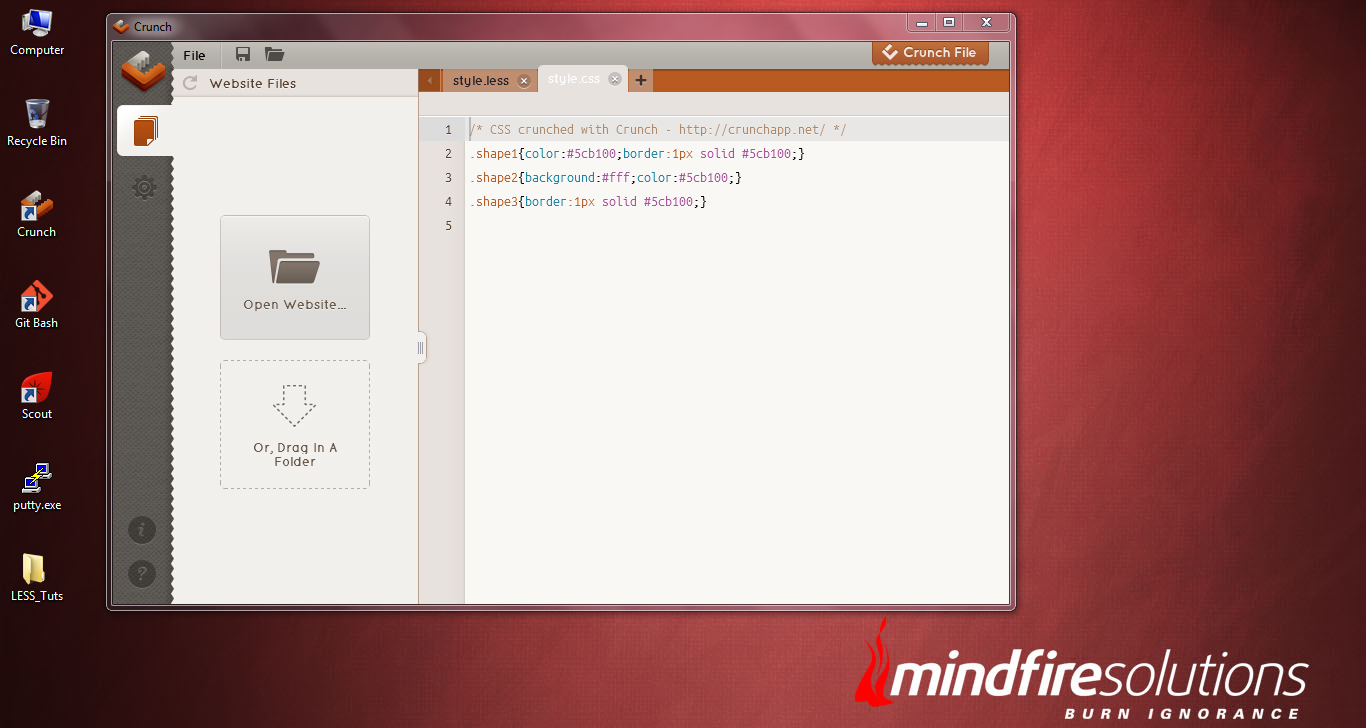
Make it a note that, every time we save our CSS code within .less file, we need to render them to .css file. To do so, click the Crunch File button at the top-right position of the Crunch compiler. This will render the style.less file into style.css file.
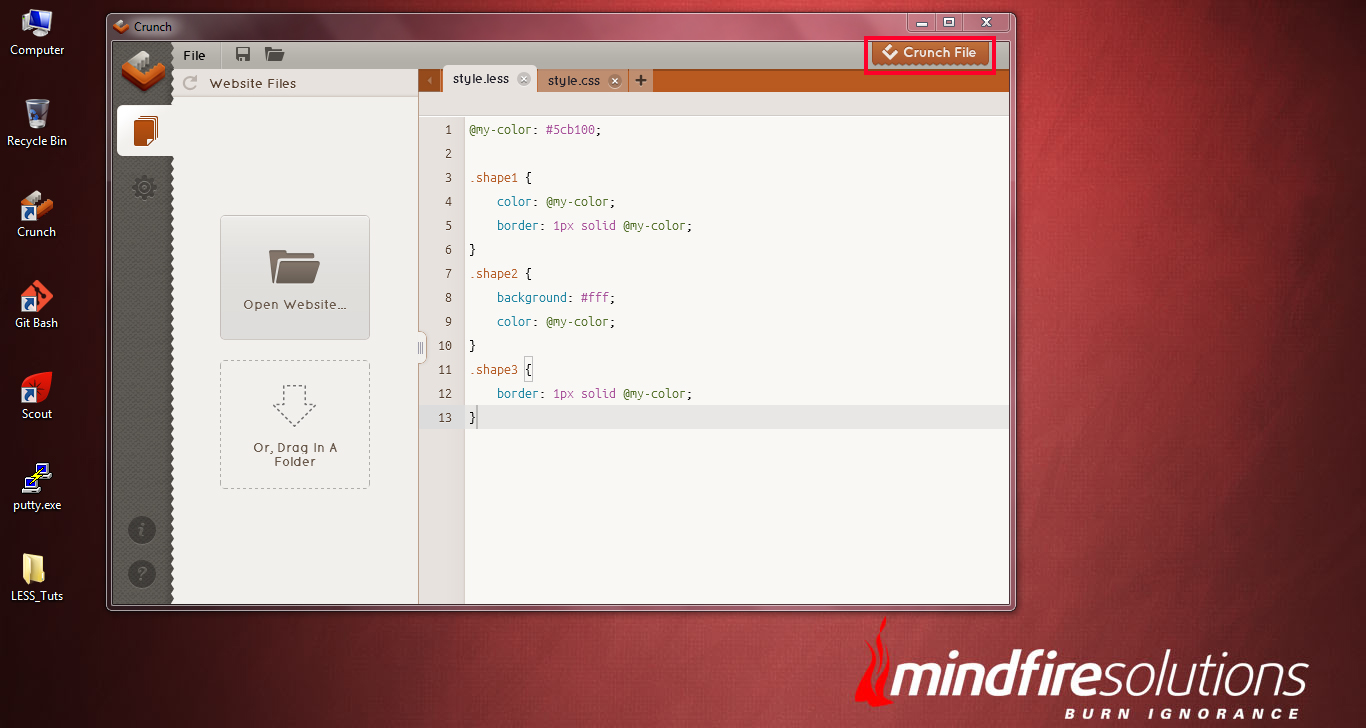
Now you can check your style.css file, how it looks. It seems to be very clean and well-commented as compared to your previously written CSS file.
MIXINS in LESS
In LESS Framework, we include a group of properties from one ruleset to another ruleset. So to define, if we have the following class:
.green-gradient {
background: #5cb100;
background: linear-gradient(top, #5cb100, #305d00);
background: -o-linear-gradient(top, #5cb100, #305d00);
background: -ms-linear-gradient(top, #5cb100, #305d00);
background: -moz-linear-gradient(top, #5cb100, #305d00);
background: -webkit-linear-gradient(top, #5cb100, #305d00);
}
As the above code defines, we have added a gradient color to a preset class “green-gradient”. Now, whenever we need to add this particular blend of gradient to any element (take for ex- a button) we just simply need to integrate the preset class “.green-gradient” in this way:
.shape1 {
.green-gradient;
border: 1px solid #ccc;
border-radius: 5px;
}
Once added and rendered the .less file, it will output to:
.shape1 {
background: #5cb100;
background: linear-gradient(top, #5cb100, #305d00);
background: -o-linear-gradient(top, #5cb100, #305d00);
background: -ms-linear-gradient(top, #5cb100, #305d00);
background: -moz-linear-gradient(top, #5cb100, #305d00);
background: -webkit-linear-gradient(top, #5cb100, #305d00);
border: 1px solid #ccc;
border-radius: 5px;
}
To use more mixins in our css3 based websites we can refer to LESS elements at LESS ELEMENTS .
What we have to do is, download the elements.less css file and keep it inside the less directory along with the style.less file.
Reference it at the top of the style.less stylesheet with:
@import “elements.less”;
Once integrated, we can reuse the classes provided from the elements.less, for example, to add a gradient colors(#F5F5F5, #EEE, #FFF) to a div with class shape1, we can write this block of code as:
.shape1 {
.gradient(#F5F5F5, #EEE, #FFF);
}
In the above code, the output will be rendered with a gradient color of Bottom-#EEE to Top- #FFF. HEre the first parameter/first color is the background color to use for browsers that don’t support gradients. The second two colors are the start and stop colors, going from bottom to top.
For further uses on LESS elements, please refer to teh documentation at LESS ELEMENTS .
Nested LESS rules
LESS CSS provides the ability to use nested css instead of or in combination with cascading. Lets implement the nesting css into the following CSS block:
#header { color: black; }
#header .navigation {
font-size: 12px;
}
#header .logo {
width: 300px;
}
#header .logo:hover {
text-decoration: none;
}
This is the traditional way of defining CSS , where we used to specify the parent of every child element while declaring any css property for them.
But if we write the same block of code using CSS , it will look somewhat like this:
#header {
color: black;
.navigation {
font-size: 12px;
}
.logo {
width: 300px;
&:hover { text-decoration: none }
}
}
The above piece of code will render the same output as the traditional method of CSS does.
Kindly notice that, we have use a “&” mark before “:hover”. It is used when there is a need for a nested selector which needs to be concatenated to its parent selector, instead of acting as a descendant. Especially it is used an an important selector mostly for pseudo-classes like :hover and :focus.
LESS CSS for Basic Operations
Basic operations like addition, subtraction, multiplication and division can also be done with the CSS file using the LESS CSS operations. WOW! Surprised. Yes, using the LESS CSS framework, now it is possible for us to do mathematical calculations and operations within the .less file which will finally rendered to required value for the elements. Any number, color or variable can assigned on CSS operations. Let’s find out how it happens:
@basic-width: 100px
.shape1 {
width: @basic-width;
}
.shape2 {
width: @basic-width * 2;
}
We the above code defines,, we have declared a value of 100px for the variable “@basic-width”, which is assigned as the width of shape1. As per our requirement, the width of the shape2 needs to be two times larger than the shape1. In our traditional CSS , we used to calculate this manually and write down the value for the width of shape2. But in LESS CSS, just simply adding “*2” with the variable “@basic-width” renders the width of shape2 two time increased in shape than shape1.
So, in this case, if anytime you want to have the width of shape1 to have increased to a different value, automatically the width of shape2 will increase depending on the width of the shape1.
Using Functions in LESS CSS
LESS framework helps in providing a variety of functions which transform in doing mathematical calculations easily. To define it with an example, we have used this method:
@width: 0.5;
.shape1 {
width: percentage(0.5);
}
The above code will render the width of shape1 to 50% of its parent element’s div. Here we have used the “percentage” function with parameter “0.5” to render the 50% width of the HTML element. !Quite straight forward.
A detailed list of LESS functions can be found at the “Functions” section of the LESS framework website.
Interpolating Strings in LESS CSS
Unlike we embed variables inside strings in other languages(like:Ruby or PHP), with the @{name} construct we can also embed variables inside strings within LESS CSS.
@url: “http://mindfiresolutions.com”;
background: url(“@{url}/images/bg.jpg”);
LESS is one of the few available CSS pre-processors. But, remember this is just the beginning into the CSS pre-processor framework. More will come along the way. I will post in a few days about the SASS and PCSS (PHP-driven CSS preprocessor).
I hope, this post has ultimately guided you in understanding the basics of using the LESS CSS framework along with the CRUNCH compiler application. If you are a web application developer and its your first time in using the LESS framework, you will find yourself to be non-techie in LESS CSS . But gradually practice makes it easier for you to go deeper into it and explore the rest of the uses of LESS framework and surely become lot easier for you.